

GolfTechIQ is reader-supported. As an Amazon Associate, we earn from qualifying purchases.
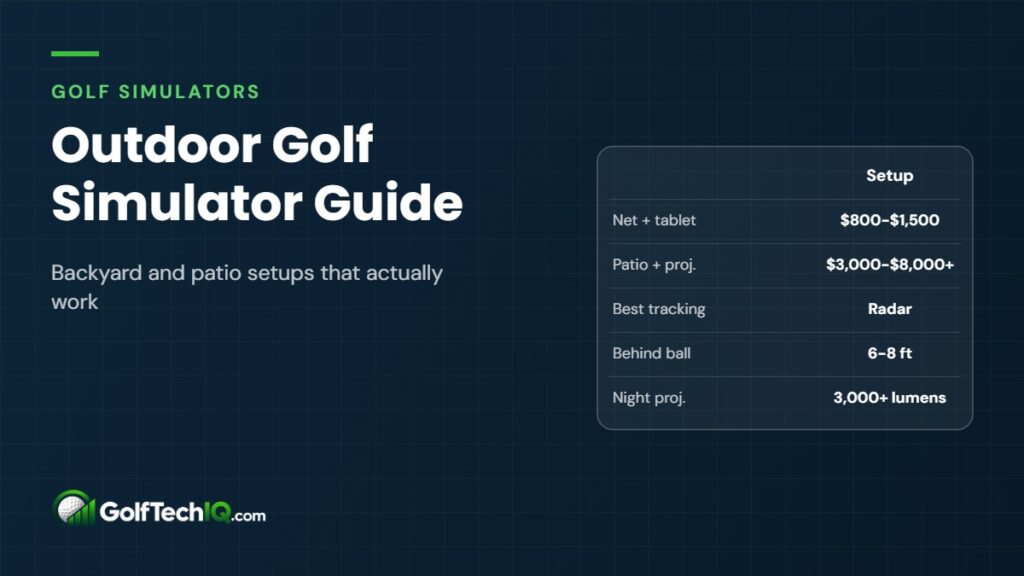
Short answer: For most backyards, the setup that works best is a radar launch monitor like the Garmin Approach R10 (about $500) or FlightScope Mevo+ (about $1,100), plus a sturdy practice net, a good mat and a phone or tablet running the sim app. Projector enclosures work outside too, but only at dusk or under a solid roof, because sunlight washes out even a bright projector. Plan on roughly $800 to $1,500 for a simple net setup, and $3,000 to $8,000 or more for a covered, projected bay.
We didn’t test these ourselves. We picked them by the numbers: how each launch monitor tracks the ball in daylight, how much space it needs behind the ball, battery life, subscription cost, sim software support and price. We also leaned on manufacturer setup specs and builder discussions for the weather, projector and power details.
Outdoor golf simulator setups at a glance
| Setup | Best for | When it works | Rough cost |
|---|---|---|---|
| Net + launch monitor + phone/tablet sim | Most backyards, renters, tight budgets | Daytime or night | $800 to $1,500 |
| Patio enclosure + impact screen + projector | Evening play, a “real sim” feel | Dusk and night, or deep shade | $3,000 to $8,000+ |
| Covered pergola or open garage door | Year-round use with a roof overhead | Best in shade; projector still needs low light | $2,500 to $10,000+ |
| Seasonal pop-up | Summer use, HOA-limited yards | Set up and take down as needed | $1,000 to $3,000 |
Before buying anything, measure the spot. Our golf simulator room size calculator works for outdoor footprints too: plug in your width, depth and any overhead clearance (a pergola beam or garage header counts) to see what fits.
The four backyard golf simulator options
1. Net + launch monitor + phone or tablet
This is the simplest backyard golf simulator and the one most people should start with. You hit into a golf practice net, the launch monitor sits behind you, and the shot shows up on a phone, tablet or laptop. There is no projector, so sunlight doesn’t matter for the picture. A tablet on a stand next to the mat is plenty for range sessions, and many apps can cast to an outdoor TV if you want something bigger.
The tradeoff is immersion. You watch a small screen instead of a 10-foot image. For practice and casual rounds, most golfers don’t mind.
2. Patio enclosure with an impact screen and projector
This is the full sim look: a frame, an impact screen, side netting and a projector. Outdoors, it really only shines after sunset or under heavy shade. A projector can’t make black, so any ambient light lowers contrast. Indoors that means closing the blinds. Outside, it means waiting for dusk or blocking light with a roof and side panels.
Builders on sim forums who have tried outdoor projection mostly say the same thing: evenings look good, midday doesn’t. Some cover the top of the enclosure with a dark tarp to cut glare on the screen.
3. Covered pergola or open garage door
A solid roof solves the two biggest outdoor problems: rain on the electronics and sun on the screen. A pergola with a solid or louvered roof, a deep covered patio, or a garage with the door open facing the yard all count. The garage version is popular because you hit from inside toward the open door, and the screen or net hangs in the doorway. If that’s your plan, measure the door header height before you buy a screen.
If you want something fully enclosed and lockable in the yard, a dedicated structure may make more sense. See our guide to building a golf simulator shed.
4. Seasonal pop-up
A pop-up net or portable enclosure goes up in spring and comes down in fall, or even after each session. This fits yards where the HOA frowns on permanent structures, and it keeps gear out of winter weather. Pick a frame you can set up alone in under 20 minutes, or it will stop getting used.
Which launch monitors work outdoors
Launch monitors track the ball in two main ways, and the difference matters a lot outside.
- Radar (Doppler): Measures the ball by bouncing radio waves off it. Light doesn’t affect tracking, so radar is the safest pick for daytime backyard use. Radar units sit behind the ball and need some room to see the ball fly, which is usually easier outdoors than in a small room.
- Photometric (camera): High-speed cameras capture the ball at impact. Some camera units handle sunlight well, others get less reliable in harsh glare or strong shadows across the hitting area. Check each brand’s outdoor guidance before you buy.
- Hybrid: Several popular units now mix radar and cameras, which tends to help outdoors.
| Launch monitor | Tracking | Behind ball | Battery | Subscription | Approx. price |
|---|---|---|---|---|---|
| Garmin Approach R10 | Radar | 6 to 8 ft | Up to 10 hrs | $99.99/yr for virtual rounds | About $500 |
| Rapsodo MLM2PRO | Dual cameras + radar | 6.5 to 8.5 ft | 2 to 4 hrs | Optional, from $199.99/yr | About $700 |
| FlightScope Mevo+ | Radar + image processing | 8 ft | Up to 3 hrs | None required | About $1,100 |
| SkyTrak+ | Cameras + dual radar | Beside the ball | Not listed | Plans required for most play | About $3,000 |
| Bushnell Launch Pro | Three-camera photometric | Beside the ball | Not listed | From $199/yr | About $3,000 |
Garmin Approach R10: best budget pick for daytime
The R10 is pure radar, so sunlight doesn’t touch its shot detection. It sits 6 to 8 feet behind the ball, and the ball should be at least 8 feet from the net. Battery life of up to 10 hours is the best in this group, which matters when the nearest outlet is across the yard. Virtual rounds through Home Tee Hero need a Garmin Golf membership at about $9.99 a month or $99.99 a year, and it also works with GSPro, E6 Connect and Awesome Golf. One outdoor quirk: other radar units nearby can interfere, so it’s not ideal for a crowded range, but a backyard is fine.
Check price on Amazon Check price at The Indoor Golf Shop
FlightScope Mevo+: best overall for backyards
The Mevo+ pairs 3D Doppler radar with image processing and has a dedicated outdoor full-swing mode with the sensor 8 feet behind the tee. Indoors with short ball flight it needs metallic stickers on the ball; outdoors with open flight it doesn’t. FlightScope says there’s no required subscription, and it ships with a 12-course E6 Connect license. At about $1,099 after a big price cut, it’s strong value. The catch is battery: up to about 3 hours, so plan for a power bank or outlet.
Rapsodo MLM2PRO: cameras plus radar, works on a phone
The MLM2PRO combines two cameras with radar and sits 6.5 to 8.5 feet behind the ball. Rapsodo markets it for indoor and outdoor use, with an operating range of 41 to 122 degrees F. True spin numbers need Callaway RPT balls. The Premium Membership is optional but adds E6 Connect and Awesome Golf access; it runs about $199.99 a year, $329.99 for two years or $599.99 lifetime. It runs on iOS and Android, which suits the net-plus-tablet setup. Battery is 2 to 4 hours.
Check price on Amazon Check price at The Indoor Golf Shop
Premium options: SkyTrak+ and Bushnell Launch Pro
If you’re building a proper covered bay, the higher-end units are worth a look. The SkyTrak+ (about $1,200 to $2,000 new while stock lasts; SkyTrak replaced it with the ST MAX in late 2025) added dual radar to its camera system, and reviewers note much better outdoor performance than the original SkyTrak. Its software plans add real cost over time, so price those in. The Bushnell Launch Pro (about $3,000) is a three-camera photometric unit that sits beside the ball. One long-term reviewer reported no trouble in direct midday sun. Its Foresight+ plans start around $199 a year for club data, with course play costing more. Both sit to the side of the ball, so they need only a couple of feet of side clearance rather than room behind you.
Screens and nets: weatherproofing and UV
Sun and moisture are what kill outdoor sim gear. Most impact screens are built for indoor rooms, and manufacturers rarely give outdoor ratings. Carl’s Place care instructions, for example, warn against letting a wet screen air dry, because it can stain. That tells you rain is a real risk. Practical rules:
- Cover or remove the screen when not in use. A fitted waterproof cover or a tarp is the minimum. Rolling it up and storing it indoors is better.
- Dry it fully before storing. Folding a damp screen invites mildew and stains. A fan helps.
- Expect UV fading. Sunlight breaks down fabric and netting over time. Look for nets sold as UV-treated or weather-resistant, and shade the setup when you can.
- Choose rust-resistant frames. Powder-coated steel, galvanized pipe or aluminum hold up better than bare steel. Fiberglass pole nets are light but can crack with age.
- Anchor for wind. A net or enclosure is a sail. Use ground stakes on grass and sandbags or weights on concrete, and take it down before storms.
For a net-only setup, a cheaper net you replace every few seasons can make more sense than an expensive one that sits in the sun all year.
Projector brightness outdoors
Indoors, a 3,000-lumen short-throw projector is the usual starting point for a dark room. Brighter rooms need 4,000 to 6,000 lumens, and sunlit spaces push into the 6,000 to 10,000 range. Outdoors in daylight, even that may not be enough on an uncovered screen. Here’s how to think about it:
- Night only: 3,000 to 4,000 lumens is fine once it’s dark.
- Dusk or covered patio: Aim for 4,000 to 6,000 lumens and add side panels or curtains.
- Daytime: Skip the projector and use a tablet or an outdoor-rated TV, or accept a washed-out image.
Projectors aren’t weatherproof. Mount them under a roof, keep them out of direct rain and morning dew, and bring them inside when you’re done. Also keep lights off the screen itself; aim any hitting-area lighting at the mat from the side.
Power and Wi-Fi
- Outlets: Use a GFCI-protected outdoor outlet with a weatherproof in-use cover. Running a projector, laptop and launch monitor off one long extension cord across wet grass is a bad idea. A permanent setup is worth having an electrician add an outlet.
- Battery planning: The R10 runs up to 10 hours, but the Mevo+ is closer to 3 and the MLM2PRO 2 to 4. A USB power bank can stretch a session.
- Wi-Fi: Most launch monitors talk to your phone over Bluetooth or their own Wi-Fi, but sim apps, course downloads and online play need internet. A mesh node or outdoor access point near the back door helps if your signal drops in the yard.
- Heat: Phones, tablets and launch monitors can overheat in direct summer sun. Shade the electronics, not just the golfer.
Mats on grass vs concrete
Hitting off real grass sounds great until you’ve dug divots into your lawn every day for a month. A golf hitting mat protects the yard and gives the launch monitor a consistent, level surface, which helps accuracy.
- On concrete or pavers: Use a thick mat with a dense foam base. Concrete has no give, so a thin mat is hard on wrists and elbows. A level patio is the easiest surface to set up on.
- On grass: Lay the mat on a flat, firm spot, and consider a plywood or paver base underneath so it doesn’t sink or tilt. Pick a mat that drains, and lift it after rain so the grass under it doesn’t die.
- Launch monitor footing: Behind-the-ball radar units need a stable, level spot 6 to 8 feet back. On grass, a small paver or board keeps them from tipping.
Want the short game outside too? A backyard putting green pairs well with a net setup and covers the part of the game most sims handle worst.
HOA, neighbors and safety
- Check HOA rules first. Many associations limit visible structures, tall nets or anything left up permanently. A pop-up or a setup that sits below the fence line is often fine where a 10-foot enclosure isn’t.
- Noise. Club strikes on a mat are loud, and impact screens add a thump. Keep late-night sessions short or talk to neighbors first.
- Light. A projector or bright work lights at night can spill into neighbors’ windows. Face the screen away from houses when you can.
- Ball containment. Use a net with side and top barriers, not just a front panel. Mishits go sideways and up. Aim away from windows, cars and the street.
- Bounce-back. Leave the recommended distance between ball and net (8 feet for many radar units) and replace worn netting before balls punch through.
- Kids and pets. Keep the swing zone clear. A simple rope line or mat border helps.
Storage between sessions
Bring the launch monitor, tablet and projector inside after every session. They’re the expensive, weather-sensitive parts. Nets and frames can usually stay out under a cover in mild weather, but take them down for winter or storm season. A deck box or a shelf in the garage keeps the mat, balls, tees and cables together so setup stays quick. If you have to haul everything out each time, simplify the setup until you can do it in a few minutes.
Outdoor golf simulator cost: three example builds
These are ballpark figures using current approximate prices. For a full line-item breakdown, see our golf simulator cost guide.
| Item | Budget net build | Mid-range backyard build | Covered patio bay |
|---|---|---|---|
| Launch monitor | Garmin R10, about $500 | FlightScope Mevo+, about $1,100 | SkyTrak+ or Launch Pro, about $3,000 |
| Net or enclosure | Practice net, $150 to $400 | Large net with side barriers, $300 to $700 | Enclosure + impact screen, $1,000 to $2,500 |
| Mat | $100 to $250 | $250 to $500 | $400 to $1,000 |
| Display | Your phone or tablet | Tablet on a stand or outdoor TV | 4,000+ lumen projector, $1,000 to $2,500 |
| Software | Garmin Golf, about $100/yr (optional) | Included E6 courses; extra optional | Plans from about $200/yr |
| Power and extras | Extension cord, power bank | Outdoor outlet, covers | Electrical work, roof or pergola not included |
| Rough total | $800 to $1,300 | $1,800 to $3,000 | $5,500 to $9,000+ |
Our take: start with the budget or mid-range build. Most backyard golfers get the bulk of the value from a reliable radar unit and a safe net. Upgrade to a projector bay once you know you’ll use it, and only if you have a roof and evening time to play.
Part of our guide: Home Golf Simulator Guide
Where to buy
Amazon is fine for basics, but a specialist store usually has a wider range of nets, mats and launch monitors, including models Amazon doesn’t carry. The Indoor Golf Shop focuses only on home golf gear, so it’s a good place to compare options side by side.
Shop golf nets at The Indoor Golf Shop Shop launch monitors at The Indoor Golf Shop
FAQ
Can you use a golf simulator outside?
Yes. Most portable launch monitors work outdoors, and radar units like the Garmin R10 and FlightScope Mevo+ aren’t affected by sunlight. The parts that struggle outside are projectors (washed out in daylight) and impact screens (not built for rain or constant UV).
Is radar or camera better for an outdoor golf simulator?
Radar is the safer pick for daytime backyard use because light doesn’t affect it. Some camera and hybrid units also handle sun well, but check the brand’s outdoor guidance. Radar units sit behind you and need 6 to 8 feet of room back there.
How many lumens does an outdoor golf simulator projector need?
At night, 3,000 to 4,000 lumens is enough. For dusk or a covered patio, aim for 4,000 to 6,000 and block side light. In open daylight, even very bright projectors struggle, so most people use a tablet or TV instead.
Can I leave my impact screen outside?
We wouldn’t. Most screens aren’t rated for outdoor exposure, and rain can stain them while sun fades them. Cover it with a waterproof tarp at minimum, and store it inside when you’re not using it for a while.
How much space do I need for a backyard golf simulator?
Plan on roughly 10 feet wide and 15 to 20 feet deep: room for the radar unit behind you, your swing, and about 8 feet from ball to net. Use our room size calculator to check your exact spot.
Do I need a subscription for an outdoor golf simulator?
Not always. The Mevo+ needs no subscription and includes some E6 courses. The R10 needs a Garmin Golf membership (about $99.99 a year) for virtual rounds. The MLM2PRO’s premium plan is optional but unlocks third-party sims.
Sources: FlightScope Mevo+, PlayBetter: Rapsodo MLM2PRO, PlayBetter: Garmin Approach R10 FAQs & specs, Stymie: Garmin Approach R10, PlayBetter: SkyTrak+ review, Golfers Authority: Bushnell Launch Pro review, BenQ: Golf simulator lighting, SimSpace Golf: Projector brightness, Carl’s Place: Golf screen care and use, Golf Simulator Forum: Outdoor impact screens
Keep reading
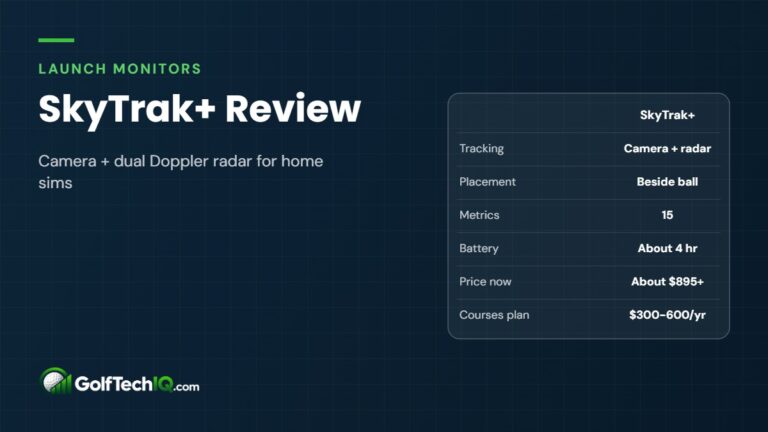 SkyTrak+ Review (2026): Photometric Plus Radar for Home Sims
The discontinued SkyTrak+ pairs a photometric camera with dual Doppler radar and sits beside the ball, making it a strong…
 Best Golf Simulator Software (2026): GSPro vs. E6 and More
GSPro, E6 Connect, Awesome Golf and launch monitor apps compared on price, courses, devices and compatibility, with 2026 pricing.
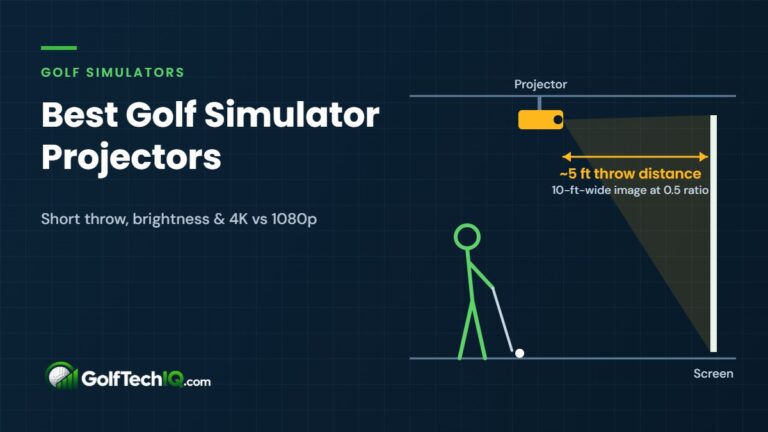 Best Golf Simulator Projector (2026): 6 Short-Throw Picks
The best golf simulator projectors of 2026, from a $1,199 Optoma to 4K BenQ laser models, compared on throw ratio,…